
It seems like - from other web pages I've looked at - that anyone who works
on thier own boat eventually modifies something. I guess I'm no differant.
Instead of replacing the carpet I decided to paint the plywood white. I was a bit worried about the edges of the plywood panels since they were never cut cleanly at the factory (the carpet covered any errors). I thought I would need to provide for some type of finished edge to hide the crooked cuts, but with the painted panels back in place the edges are not that noticeable.
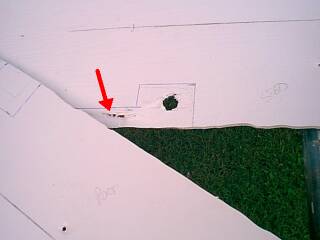
But, there was a noticeable gap between the two panels and the plywood was crushed (pointed to by the red arror in this picture) by the tabernacle support so a few changes were called for.
First, I glued a small piece of oak to the cabin ceiling directly under the
mast tabernacle. This small piece is about the thickness of the plywood panel
and carpet and the support post fits much better now.
Second, I cut out the plywood panel to fit around the support post and also
cut out an area around where the electrical connections for the mast are.
Lastly, the whole area forward of the mast support will be covered with a thin
box and some simple moulding will be used on the support post to cover the
cutout gap.
I wanted to retain the original Macgregor panel and I didn't want to replace the plywood panel it was mounted on, but I needed to cover the extra holes the previous owner had made. My solution was to cover the area with a piece of smoked plexiglass I had and mounting the original panel on that. I did wind up adding a fourth fuse through the plexiglass for a bilge pump circuit, an in-line fuse behind the panel for the 12 V power outlet and a master disconnect breaker - also behind the panel. In addition, all the boat wiring is connected to terminal strips and all of the connections on the panel have been insulated. One of these days I will probably decide to redo the complete plywood panel but for now, this will do.
I've added a real battery box instead of the metal strap that was there to hold the battery in place.
Revised 02/07/2005 |
Web development by Adirondack Consulting |